Tonight I got the urge to do this again, but this time for me! My husband and I are going on an awesome date tonight and I am sooo excited! It will consist of a horse-drawn sleigh ride to a cabin in the woods, then a steak and prawn dinner, hot cocoa, live music and story-telling, then another cuddling-under-a-blanket sleigh ride back to our car. Our wonderful friends have offered to watch the kids for us so we can have this one last experience as a couple before we move away from the area.
Anyway, back to the project. I decided I wanted a cute hat and glove set to wear this evening so I dug through my pile of wool and cashmere thrift store sweaters until I found a lovely, soft, oatmeal-colored cashmere one that would be perfect.
(Unfortunately because I took these photos at night under my desk lamp, the lighting is HORRIBLE, but hopefully you'll at least get the idea of what I was doing.)
Here's the sweater. Nothing really wrong with it other than it was too small for me to wear as-is.

After deciding that I wanted 5 sections to my hat, I measured my head and tried to figure out how to translate it into a pattern, then cut out a paper template.
Once you've got your pattern piece, using a washable ink pen, trace the 5 pieces along the hem of the sweater...
...and cut them out.
Pin two sections together, right sides facing and pin.
Starting at the hem, stitch the sections together stopping before you get to the very edge. My sections had a 1/2" seam allowance, so I stopped my stitching 1/2" before the edge.
Once you've stitched your sections together, start topstitching over the seam allowances so they lay flat.


When you've stitched all of your sections to one another, sew the final two pieces together you'll have a hat! Stitch those last two seam allowances down and you're done. You may have a tiny hole at the top where all the points of each section come together. If so just handstitch it closed.
Here's where you can have fun and embellish it with embroidery, a brooch, applique, buttons- whatever you can think of!
Okay, now this is the easiest way to make mittens that I can think of.
Take the sleeve of your sweater and lay your hand on it so that the hem of the sleeve comes to where you'd want the wrist of your mitten to be (i.e. right at your wrist, all the way to your elbow, or somewhere in between). Keep your fingers together and thumb extended a bit, leaving at least 1/8" of fabric between the outside of your fingers and the edge of the sleeve.
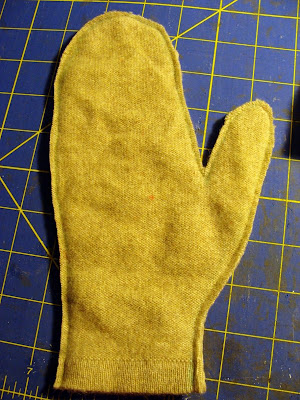
Using disappearing or water soluble ink, trace your hand. Don't trace right up next to your hand, but leave some space so that the mitten will be comfortable. This line will be your stitching line.
DO NOT CUT ALONG THIS LINE. Don't even cut CLOSE to this line. Place some pins along the line to keep both layers together then roughly cut the drawn mitten off of the rest of the sleeve.
Sew along the line you drew, backstitching at both sides of the wrist and in the notch of the thumb for reinforcement.
Now you can trim away the excess fabric about an 1/8" away from your stitching.
Repeat with the other sleeve. Turn them right side out and embellish as you'd like.
I have a ton of this acrylic punch embroidery yarn so I used a skein of ivory to do a little X detail along the hems of the mittens and on the hat.
I have a confession: My hat ended up being pretty snug and about an inch too short (guess I didn't do something right with my measurements), so I cut off what was left of the hem on the sweater and added it to the hem of my hat using a zig-zag stitch. The X detail is to sort of cover up my goof. :) Can't wait to wear them on my date!

11 comments:
So super cute!!!
I absolutely love your hat and mittens! Thank you for sharing.
The account aided me a acceptable deal.
I am really impressed with your blog article, such great & useful information you mentioned here.
I have read all your posts and all are very informative.
Nice! Thank you!
Thanks for such a valuable post.
I am waiting for your next post.
I have enjoyed a lot reading this post keep it up.
I like it best and I will check it again and save it.
Please also visit the website of my remarks.
Post a Comment